Neon Tetra Reproduction – Care Guide
Neon tetra reproduction requires soft, acidic water (pH 5.0-6.0), low lighting, and temperatures around 75°F. Success involves conditioning parents with live foods and protecting the light-sensitive eggs in a dedicated spawning tank.
Successfully achieving neon tetra reproduction is often considered a “rite of passage” for many serious freshwater aquarists. While these fish are ubiquitous in the hobby, they are notoriously selective about their spawning conditions, making the process both challenging and rewarding.
In my experience of over a decade in the hobby, I have found that Paracheirodon innesi (the scientific name for the Neon Tetra) requires a very specific set of environmental triggers to move from schooling to spawning. If you have ever kept bright neon tetra groups, you know how much energy they bring to a tank.
This guide will walk you through every nuance of the process, from sexing your fish to raising the microscopic fry. We will focus on creating a habitat that mimics the Amazonian blackwater environments where these fish naturally stay healthy.
At a glance: Neon tetra (Paracheirodon innesi)
- Temperature
- 72–78°F (22–26°C)
- Water pH
- 6.0–7.0
- Adult size
- 1.5 in (4 cm)
- Minimum tank
- 10 gal (20 gal for a proper school)
- Group size
- Groups of 8+
- Temperament
- Peaceful
- Diet
- Omnivore: micro pellets, flakes, frozen daphnia
- Lifespan
- 5–8 years
Keeper’s tip: Add neons only to a fully cycled, stable tank; they are among the first fish to suffer from ammonia swings.
Understanding Neon Tetra Reproduction Fundamentals
Before you set up a breeding tank, it is vital to understand that neon tetra reproduction is not an accidental occurrence in a standard community aquarium. These fish are egg-scatterers, meaning they do not provide parental care and will actively eat their own eggs if given the chance.
The biological drive to spawn is triggered by the arrival of the rainy season in the wild. This translates to softer water, a drop in mineral content, and an abundance of high-protein food sources.
To be successful, you must replicate these seasonal shifts within a controlled environment. I have noticed that many beginners fail because they attempt to breed neons in tap water that is far too hard or alkaline for the delicate eggs to survive.
How to Identify Males and Females
Distinguishing between male and female neons can be tricky because their physical differences are subtle. You generally need to observe them closely when they are fully grown and well-fed to see the variations in body shape.
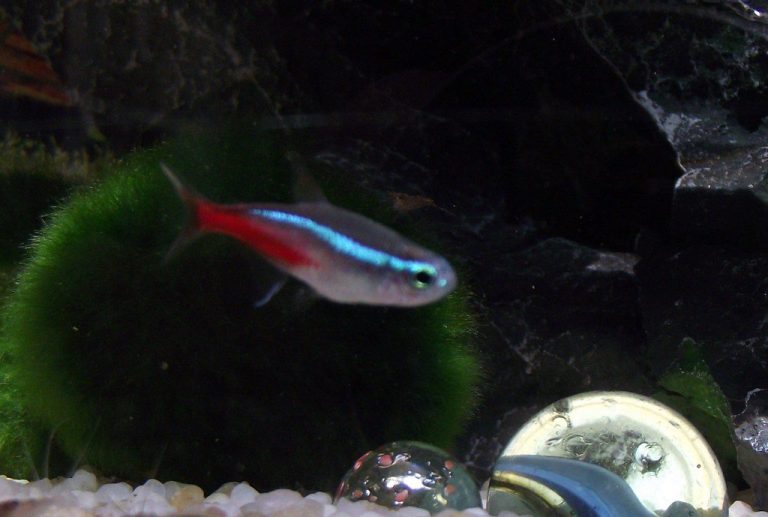
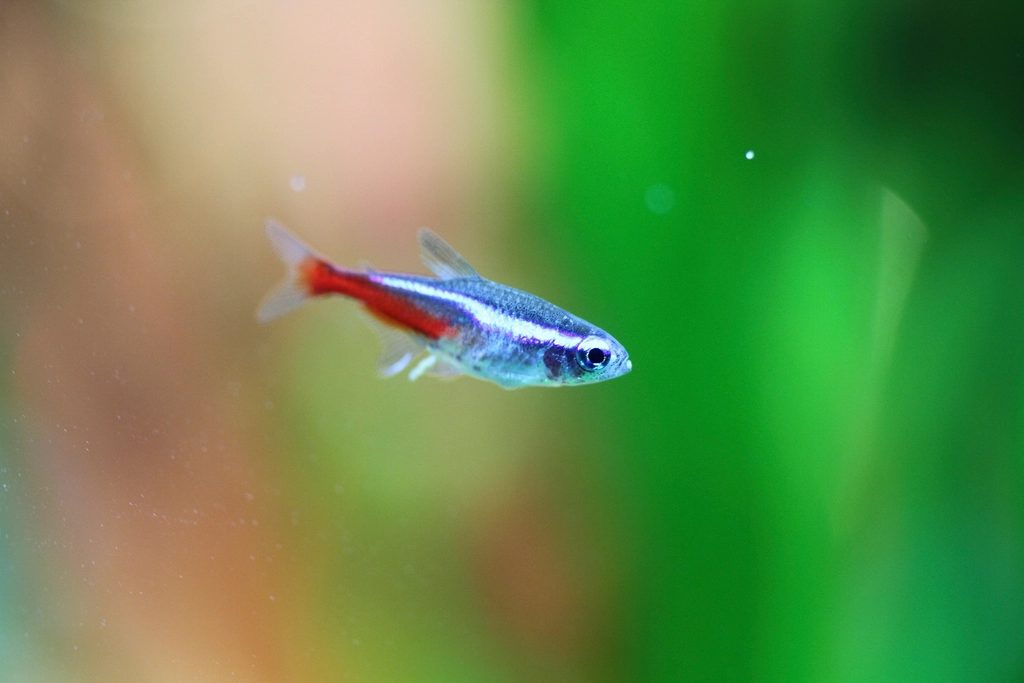
The most reliable indicator is the “neon line” that runs along their body. In males, this line is typically straight, whereas, in females, the line often develops a slight curve or “kink” due to their rounder, egg-carrying bellies.
| Feature | Male Neon Tetra | Female Neon Tetra |
|---|---|---|
| Body Shape | Slender and streamlined | Rounder, deeper, and more strong |
| Blue Stripe | Straight and horizontal | Often curved or bent upward |
| Size | Slightly smaller | Slightly larger and wider |
Pro Tip: When selecting a pair, look for the most active male and the “fattest” female. A female that looks like she has swallowed a marble is likely full of eggs and ready for the breeding tank.
Preparing the Ideal Spawning Environment
Setting up a dedicated breeding tank is non-negotiable for neon tetra reproduction. A small 5 to 10-gallon tank is perfect, as it allows you to control the water chemistry with extreme precision.
The water must be incredibly soft and acidic. In the wild, neons live in “blackwater” habitats where decaying organic matter releases tannins, lowering the pH and creating a sterile environment that prevents fungus from attacking the eggs.
I always recommend using peat filtration or adding a high-quality blackwater extract to the water. This adjusts the chemistry and also provides the dark, stained water that makes the fish feel secure enough to spawn.
Critical Water Parameters for Success
The eggs of Paracheirodon innesi are highly sensitive to mineral content. If the water is too hard, the shell of the egg will harden too quickly, preventing fertilization or stopping the fry from breaking out.
You should aim for a dGH (degree of General Hardness) of 1.0 to 2.0. Monitoring the specific conductivity of the water is also a professional-level trick; keeping it below 100 microsiemens often yields the best results.
| Parameter | Target Value for Spawning |
|---|---|
| Temperature | 74°F – 76°F (23°C – 24°C) |
| pH Level | 5.0 – 6.0 |
| Hardness (dGH) | 1.0 – 2.0 |
| Lighting | Extremely Dim / Near Darkness |
Conditioning Your Breeders for Spawning
You cannot simply move neons into a tank and expect them to breed immediately. Conditioning is the process of feeding the fish high-quality, protein-rich foods to encourage egg production in females and vigor in males.
During the conditioning phase, which usually lasts 7 to 10 days, I separate the males and females if possible. This separation creates a “reunion” effect when they are eventually placed together in the spawning tank, which often triggers immediate interest.
Focus on live foods such as baby brine shrimp, daphnia, or bloodworms. If live food isn’t available, high-quality frozen options are a suitable alternative, but they lack the movement that stimulates the hunting and mating instincts.
Pro Tip: Slowly lower the temperature in the conditioning tank by 1-2 degrees over a week, then raise it slightly when you move them to the breeding tank. This mimics the warming of water after a cool tropical rainstorm.
The Spawning Process and Egg Management
Once your pair is conditioned and the breeding tank is ready, introduce them in the evening. Most neon tetra reproduction occurs in the early morning hours, often just as the first hint of light hits the tank.
Since neons are egg-scatterers, you need a way to protect the eggs from the parents. I find that using a spawning mop made of dark synthetic yarn or a layer of glass marbles on the bottom of the tank works best.
The eggs will fall between the marbles or into the yarn, where the adults cannot reach them. Once you see the female looking noticeably thinner and see tiny, clear spheres among the substrate, remove the adults immediately.
The Danger of Photosensitivity
One of the most unique aspects of neon tetra reproduction is that the eggs and newly hatched larvae are highly light-sensitive. Strong light can actually kill the developing embryos within hours.
I suggest wrapping the sides of the breeding tank in black construction paper or keeping it in a dark closet. You should only use a very dim flashlight for brief inspections to check for “fungused” eggs.
Eggs that turn white are infertile and are often attacked by Saprolegnia, a common water mold. If left in the tank, this fungus can spread to healthy eggs, so they must be carefully removed with a pipette.
Raising Neon Tetra Fry: The First Weeks
The eggs usually hatch within 24 to 36 hours. At this stage, the fry are tiny “sliver-like” organisms that will cling to the glass or the spawning mop while they absorb their yolk sacs.
After about 3 to 4 days, the fry will become free-swimming. This is the most critical stage because they are far too small to eat standard crushed flakes or even baby brine shrimp.
You must have a culture of Infusoria ready. These microscopic organisms are the only food small enough for neon tetra fry to consume during their first week of life.
Fry Growth and Feeding Schedule
As the fry grow, you can gradually transition them to larger foods. Maintaining water quality during this time is difficult because you are feeding frequently, but the fry are sensitive to osmotic shock from large water changes.
| Age of Fry | Recommended Food |
|---|---|
| Days 1-4 | Yolk Sac (No feeding required) |
| Days 5-10 | Infusoria / Green Water |
| Days 11-21 | Vinegar Eels / Liquid Fry Food |
| Day 21+ | Freshly Hatched Brine Shrimp |
When performing water changes for the fry, I use a slow drip method. This helps make sure that the new water matches the temperature and chemistry of the tank perfectly, preventing any sudden shocks to their developing systems.
Mastering Neon Tetra Reproduction: Common Challenges
Even experienced breeders face hurdles when it comes to neon tetra reproduction. One of the most common issues is the “disappearing egg” act, which is usually caused by water that is too hard.
If the mineral content is high, the egg membrane becomes impermeable, and the sperm cannot enter. This results in 100% infertility. Always use Reverse Osmosis (RO) water remineralized very lightly to avoid this.
Another challenge is the “die-off” that occurs around day 14. This is often due to a buildup of waste. Using a sponge filter with a very low flow rate is essential to keep the water clean without sucking up the tiny fry.
If you have mastered this species, you might be interested in breeding other tetra species that share similar requirements but are slightly more forgiving of water parameters.
A few common questions
How many eggs do neon tetras lay?
A healthy female can lay anywhere from 60 to 130 eggs in a single spawning session. However, because the eggs are so small and sensitive, it is common for only a small percentage to reach adulthood in a home aquarium.
Can I breed neon tetras in a community tank?
It is virtually impossible. The eggs will be eaten by other fish, and the water parameters in a community tank are usually too hard and alkaline for the eggs to remain viable.
Why do my neon tetra eggs turn white?
White eggs are infertile or have been killed by light or fungus. This is often a sign that the water was not soft enough or that the parents were not properly conditioned before the spawning attempt.
How long does it take for fry to show color?
You will typically begin to see the iconic blue and red stripes appear when the fry are about a month old, provided they are receiving excellent nutrition and frequent small water changes.
In short
Mastering neon tetra reproduction is a journey into the fine details of aquarium chemistry and fish biology. If you provide the soft, acidic, and dark conditions they require, you are not just breeding fish; you are replicating a complex ecosystem in your own home.
Remember that patience is your best tool. It may take several attempts to get the water parameters just right, but the sight of a tiny cloud of neon fry schooling for the first time is a reward unlike any other in the hobby.
If you found this guide helpful, you may also enjoy learning about penguin tetra breeding, which offers a similar challenge with a very different aesthetic. Keep experimenting, keep testing your water, and enjoy the incredible world of aquarium breeding.

- 2003First tank
- 20+Years keeping
- 40+Tanks kept
- 0Sponsored picks
Howard set up his first 10-gallon planted tank in 2003 and lost half of it within six weeks. Two decades and more than forty aquariums later, he writes the guides he wished he had then: clear numbers, the reasons behind them, and what actually goes wrong in home tanks.